Basketball Defensive Strategies: Principles, Systems, and In-Game Adjustments
A detailed look at basketball defensive strategies, including man-to-man defense, zone systems, ball-screen coverage, help defense, rebounding, and practical adjustments.
Effective basketball defense is not defined by one formation or a single aggressive tactic. It is a coordinated process that limits efficient shots, protects the paint, forces difficult decisions, and finishes possessions with a defensive rebound. The best defensive teams combine individual technique with clear rules for help, switching, closeouts, communication, and transition.
A useful defensive plan begins with the opponent’s strengths. A team with elite perimeter shooting may require tighter closeouts and more disciplined screen navigation, while a lineup built around a dominant interior scorer may need early help and carefully timed double-teams. The system should support those priorities without creating easy passes elsewhere.
Core principles of basketball defense
Protect the rim and control the middle
Most defensive systems begin by reducing access to the basket. Drives create high-value shots, foul opportunities, offensive rebounds, and passing angles to open shooters. On-ball defenders should influence the ball toward help rather than allowing an unrestricted path to the middle of the floor.
Protecting the paint does not mean every defender should collapse immediately. Excessive help can leave corner shooters unguarded and create simple skip passes. The stronger principle is early positioning: the nearest help defender should be able to discourage the drive while still recovering to a realistic passing threat.
Make the offense work for every advantage
Good defense often turns a clean offensive action into a less efficient option. A defender may force a ball-handler away from a preferred hand, make a cutter change direction, or push a screen user farther from the lane. These small disruptions matter because they shorten the time available for the offense to create an open shot.
Defensive pressure must remain controlled. Reaching from behind, lunging at shot fakes, or overplaying without help can produce fouls and driving lanes. The objective is not constant gambling; it is to reduce the offense’s preferred choices while preserving team balance.
Finish the possession with a rebound
A missed shot is not automatically a defensive success. If the offense secures a second chance, the original stop has been weakened or lost. Defensive rebounding requires all five players to locate an opponent, make contact when appropriate, pursue the ball, and secure it with two hands.
Guards also have a rebounding responsibility, particularly when a long shot produces a rebound outside the immediate area of the centers. At the same time, teams must decide how many players can leave early for transition. That decision should reflect the opponent’s offensive-rebounding strength rather than a fixed rule.
Man-to-man defense
Man-to-man defense assigns each player primary responsibility for an individual opponent, but it is not a series of isolated one-on-one matchups. Players must provide help, rotate to open threats, communicate through screens, and recover when the ball moves.
On-ball positioning and closeouts
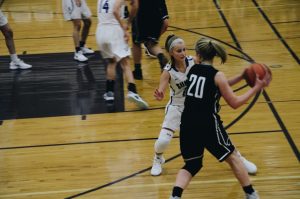
The on-ball defender should use a balanced stance, stay low enough to react, and maintain a position that protects the most dangerous driving lane. The correct angle depends on the opponent’s shooting and driving ability, the location of help, and the team’s scouting report.
A closeout must balance two risks: giving up a direct drive and allowing an uncontested shot. Closing out under control is usually preferable to sprinting past the shooter or jumping at a pump fake. The defender should arrive with short steps, contest without unnecessary contact, and be ready to slide rather than cross their feet.
Help-side defense and rotation
Help-side defenders should position themselves according to the ball and their assignment. When the ball is on one side of the court, a weak-side defender may move toward the lane to deter a cut or drive while remaining close enough to recover to a shooter. The exact distance changes with the passer’s vision, the shooter’s range, and the speed of the potential rotation.
Once a defender helps, another player often has to rotate behind them. This is known as the defensive chain: one player stops or slows the ball, the next covers the first player’s assignment, and another defender may close out to the next pass. A defense that helps without rotating simply trades a drive for an open shot.
Screen defense
Offensive screens are designed to create separation, so the defense needs a specific response. The main options include going over the screen, going under it, switching, or using a temporary show or hedge before recovering.
- Go over: The defender fights over the screen to stay connected to a capable shooter. This can be effective against pull-up threats but requires help on the roller.
- Go under: The defender moves beneath the screen and protects against the drive. It is more suitable against a poor perimeter shooter or a ball-handler who needs space to attack.
- Switch: Defenders exchange assignments. Switching limits immediate separation but may create a size or speed mismatch.
- Show or hedge: The screener’s defender briefly steps toward the ball-handler to slow the action, then recovers. Timing and communication are essential because the temporary help can expose the roller.
Screen coverage should be consistent enough that players can react quickly, but it may need to change based on personnel. A team should not automatically switch every action if the resulting mismatch gives the offense a reliable post-up or driving target.
Zone defense and its variations
Zone defense assigns players to areas rather than maintaining a fixed individual matchup. Common alignments include the 2-3 zone, 3-2 zone, and 1-3-1 zone. Each protects certain spaces while conceding others, so the choice should reflect the opponent’s shot profile and passing ability.
2-3 zone
The 2-3 zone places two defenders near the top and three across the back line. It can protect the paint and reduce direct post entries, particularly when the interior defenders are strong. Its vulnerabilities often include high-post touches, short corner passes, and quick ball movement that shifts the top defenders.
3-2 zone
A 3-2 zone places more defenders high on the floor and can challenge perimeter shooting more effectively than a traditional 2-3 alignment. The trade-off is greater exposure along the baseline, in the short corner, and around the offensive glass if the back line is stretched.
1-3-1 zone
The 1-3-1 zone uses a defender at the top, three across the middle, and one near the baseline. Its length and angles can disrupt passing lanes and trap along the sidelines. However, the corners and baseline require precise rotations, and poor communication can produce open three-point attempts.
Zone defense is not passive defense. Players still have to contest shots, box out, close gaps, and communicate. A zone that allows stationary shooters to receive the ball comfortably can be less effective than disciplined man-to-man coverage.
Defending pick-and-roll attacks
The pick-and-roll is one of the most important actions in modern basketball because it forces the defense to manage the ball-handler, screener, roller, and potential shooters at the same time. The coverage should account for the ball-handler’s shooting range, the screener’s finishing ability, and the spacing around the action.
In drop coverage, the interior defender stays closer to the basket while the on-ball defender works to recover. This protects against the roll and drive but may concede pull-up jumpers or pocket passes if the ball-handler has time. Aggressive hedge coverage can disrupt the first action but requires a fast recovery and reliable weak-side rotations.
Switching can simplify the immediate action, especially against teams that use multiple players who can defend different positions. The limitation appears after the switch: the smaller defender may be attacked near the rim, or the larger defender may be isolated in space. Teams should prepare a second response, such as sending a late dig, scram-switching the mismatch away, or bringing help from a specific shooter.
Transition defense and defensive communication
Transition defense begins before the shot is released. Players need to understand who is responsible for stopping the ball, protecting the rim, and locating dangerous shooters. A team that waits for the opponent to cross half court has usually surrendered valuable time and space.
The first defender back should slow the ball-handler without overcommitting. Other defenders must sprint to the paint, identify threats, and communicate matchups. If the opponent has numbers, protecting the rim and preventing a direct pass to an easy finisher generally take priority over immediately chasing a less dangerous perimeter player.
Communication should be early, specific, and repeated when necessary. Calls such as “screen left,” “switch,” “help,” “roller,” or “cutter” give teammates information before the action develops. Silent defenses often arrive late because every player is reacting individually.
How to choose and adjust a defensive system
A defensive strategy should be evaluated through the shots and advantages it permits, not only through points allowed. Useful observations include paint touches, open catch-and-shoot attempts, free throws, turnovers forced, offensive rebounds allowed, and the quality of shots conceded after rotations.
Adjustments should address a specific problem. If a guard repeatedly turns the corner, the defense may change the screen angle or bring earlier help. If corner shooters are creating damage, the team may reduce unnecessary help from the corners and ask the low defender to rotate from a less dangerous area. If post defense is failing, a selective double-team may be preferable to constant pressure that opens every perimeter pass.
There is no universally superior basketball defensive strategy. Man-to-man coverage offers accountability and flexible help rules, while zone defense can protect the paint and change the opponent’s rhythm. Switching may reduce separation but create mismatches. Aggressive pressure can generate turnovers but also give up back cuts and fouls. The best system is the one players can execute with clear responsibilities and that is suited to the opponent’s personnel.